When I began this project I had many questions such as how many coats of stain will it take for my table to get the color that I desired. I was also curious about what tools I would need to complete this task as well as what is the most effective way to sand a table. I had no anwer to these questions but was able to find a huge bank of answers in the online discovery tool, Pinterest. I was able to easily find blogs on Pinterest where people have done home projects such as the one I did for my 20% Project. I learned that in order to appropriately sand a table I would need coarse and fine sandpaper. I learned on Pinterest that the most effective way to sand a table is to go with the grain of the wood. Prior to staining the table I had no idea that it was important to also apply a couple coats of polyurthene after staining. I learned this while reading blogs that I got from Pinterest. These blogs were also helpful because bloggers who had done a similar project before were able to provide insider tips that the directions on the cans could not. While I was sanding and staining the table I came across issues that I did not consider such as how to dispose of the stain and paint thinner in an environmentally-friendly manner. I had to look up blogs on Pinterest to get these answers. The skills that I learned from this project were not only handcrafting skills but also how to implement online resources to solve problems. My final product was great! I love how my coffee table came out and I cannot wait to put it in my living room. I was not able to finish the entire project over the course of 5 weeks but I will continue to work on this project over the next couple of months to ensure that I have a dining table set. I have found chairs that I am going to reupholster; however I am still missing the table. I plan to look at Goodwills across San Diego County as well as OfferUp, an app where users sell items online. OfferUp is similar to Craigslist but with easier access to photos. Once I find the table I will attempt to make it match the chairs that I have reupholstered. This project has been a great learning experience for me!
|
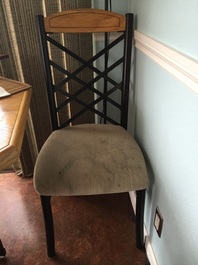
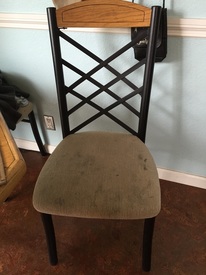
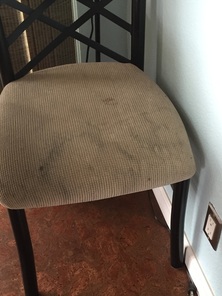
Over the course of the weeks I have been looking for chairs to reupholster. I had not had any luck until recently! This past weekend I went to a birthday party with my sister and found some chairs that would work perfectly for me to reupholster. The chairs were not being used as dining table chairs, rather as chairs that they used for get-togethers. My sister noticed that they were old and were not used as often and she asked her friend if she would consider selling her chairs. The friend mentioned that she was actually trying to get rid of the chairs. My sister said that I would be more than happy to take them off her hands. My sister's friend was kind and willing to given them to me for free, but I insisted and gave her $20 for them.My goal is to reupholster these chairs:
I will use online resources that I have found on Pinterest to help me. After I reupholster the chairs the next step would be for me to find a dining table to fit the chairs so that I can finally get my dining set for my apartment in July. I cannot wait to see what happens!
I was not able to finish the project over the 5 weeks but I will continue to work on this project for the next couple months before I move into my apartment. 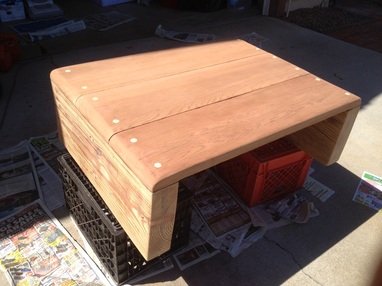 As I mentioned last week, before I began staining the table I sanded it down one last time in order to remove all the previous polyurethane so that the stain can penetrate the wood better. I sanded the table down and then blew off all the saw-dust using a leaf blower. This is what it looked like with the final sanding! 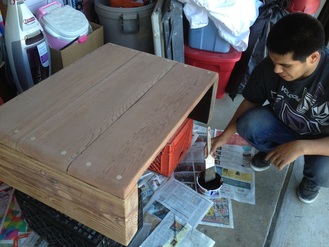 I had to be smart about this because once I started staining I would not be able to move the table. Therefore, I decided to put the table inside my garage before staining. I put the table on top of crates and laid newspaper down so that the stain did not drip on the garage floor. I stained the bottom of the table first because I knew that if I did the top first I would not be able to flip the table over. After the bottom of the table was stained I began staining the top of the table.
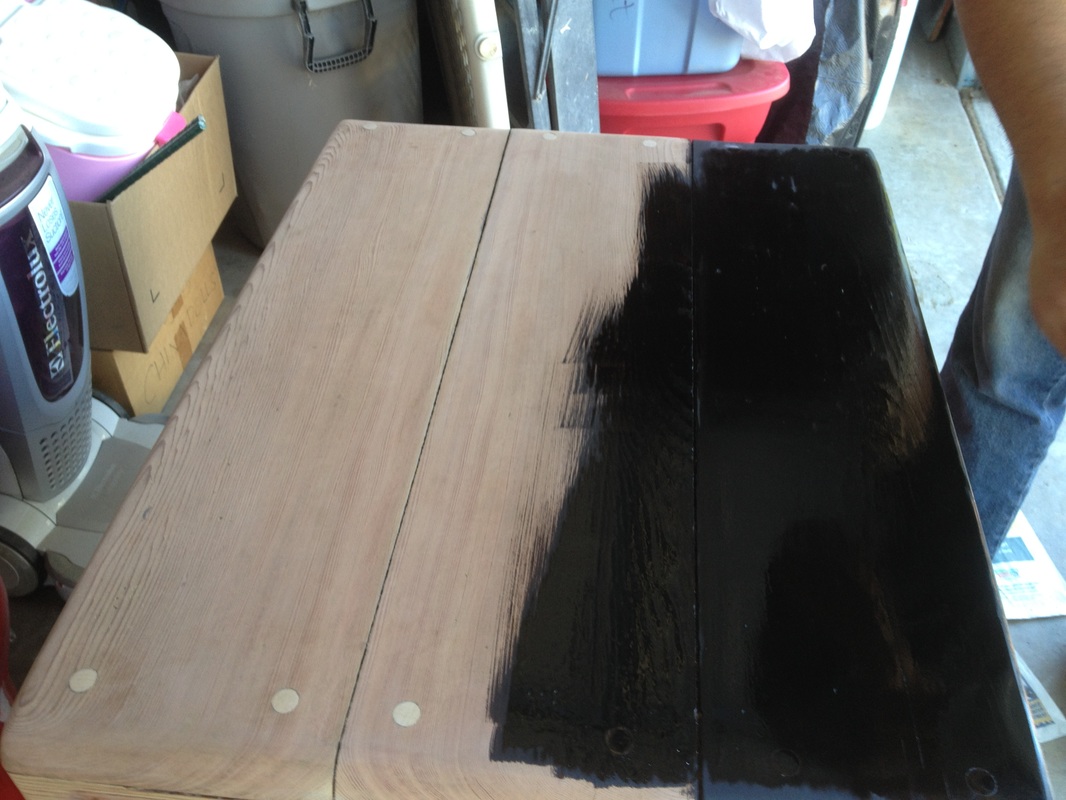
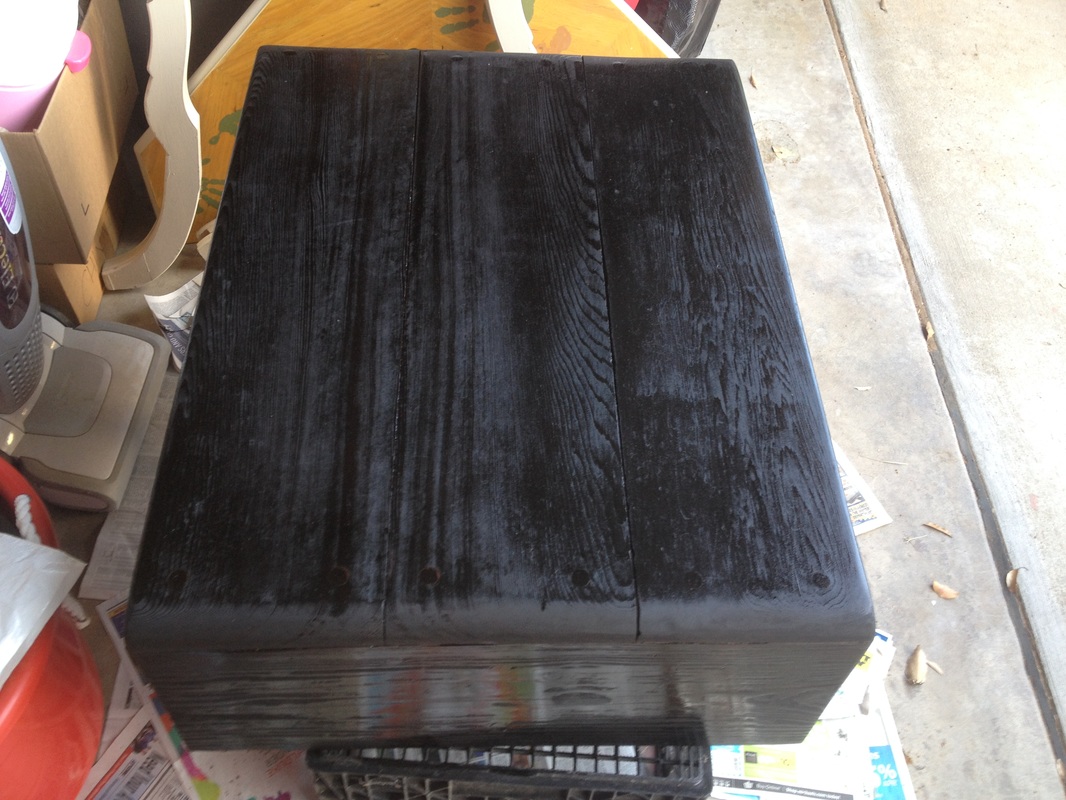
This is what the first coat of stain looked like!
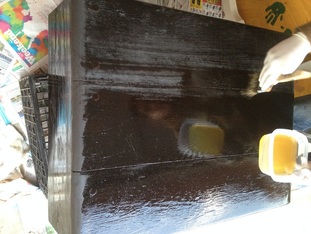
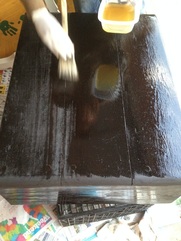
After I finished staining the table I needed to let the table dry for 6 hours before I could apply the second coat of stain. Once the six hours had passed I went to go stain the table once more. This is what the second coat looked like.
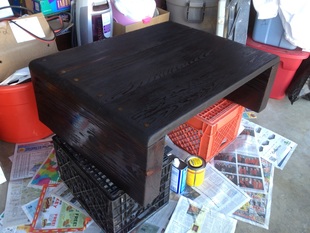
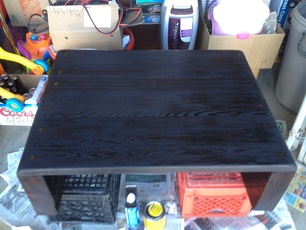
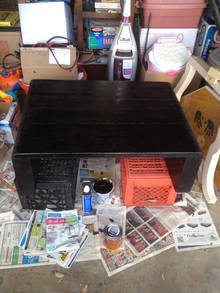
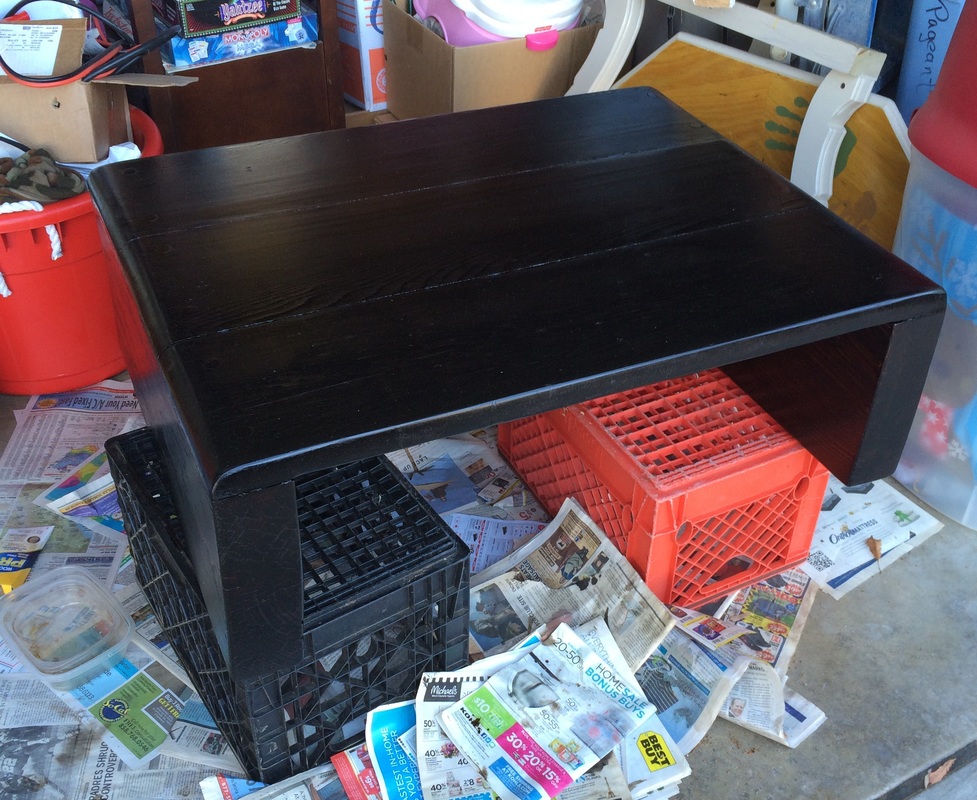
Here is the final product! I am so happy with my new coffee table. Compared to the original coffee table I was given the final product looks like a brand new table.
The goal for next week is to find some chairs for me to reupholster. I know that I may not finish reupholstering over the next week but I will continue to work on this project so that when July comes around I have some furniture for my new apartment.
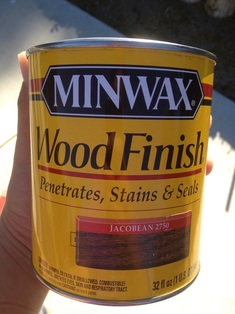
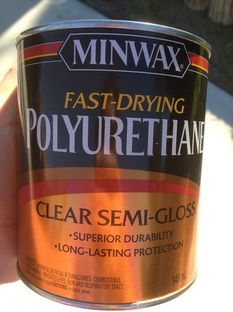
Stay tuned to see what I can find! 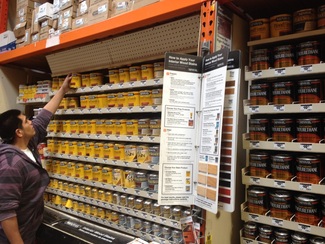 This week turned out to be more intense than I thought. The goal was to buy the stain that I desired my coffee table to be as well as stain the table. I found that choosing the stain was a lot harder than I imagined. I went to Home Depot thinking I would walk in and walk out with the perfect stain. Note that I thought it would be one container; however, when I showed up I found out that there were a few elements that I did not consider. Apparently I needed more than just stain, I needed polyurethane. The workers at Home Depot were kind and willing to help, but I turned down their assistance because I believe I should have gone in more prepared. I went home and looked at my pins on Pinterest. In order to learn more about stains and polyurethane I referenced the following blog: Tip-Top Table. I learned that it would be ideal if I bought an oil-based stain as well as oil-based polyurethane that is semi-gloss. I am glad that I read this blog before proceeding because Katie (the blogger) mentioned that her finished product had yellow spots which were the areas that she did not sand well enough and still had the previous polyurethane. As a result, I felt that I might re-sand my table again before applying the stain but unfortunately I ran out of sanding paper so the plan was to buy sanding paper when I bought the stain and polyurethane.
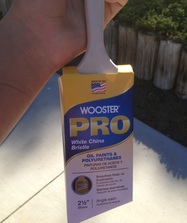
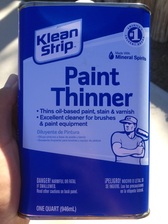
I felt ready to go stain my "new" coffee table! As I was checking out one of the Home Depot employees asked me if I had a paint brush. I had not considered that so he showed me what he recommended as an ideal brush. Through his recommendation I picked out the WOOSTER Pro White China Bristle brush which cost $12.78. I was going to get two of those brushes which would have put me at about $25, but the Home Depot employee recommended that I use that brush for the stain and the polyurethane and buy Klean Strip Paint Thinner to clean the brush, which only cost $6.97. I would save about $6 in doing so!
After walking out of Home Depot I ended up paying $48.52 for all the supplies I needed to stain my "new" table. It did not really feel like "More saving, More doing" as the receipt claims. Nevertheless, I am ready to stain now after a major setback of not going to the store prepared. 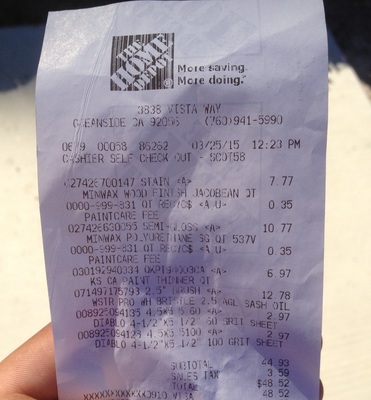 Stay tuned for next week because this time I WILL be staining. I will post a video of me staining the coffee table.
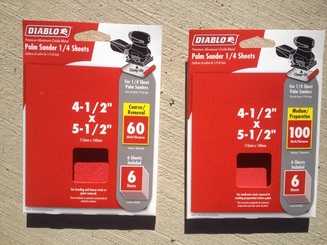
For tips and tricks, I referenced a post that I pinned on Pinterest from the following blog: How To Refinish a Table. I started out with 60 grit sandpaper as recommended. As I was sanding I noticed that it was difficult to remove the preexisting glossy stain. However, I continued sanding and followed the recommendation to sand with the grain of the table. Initially I felt that I was not making any progress because the process was taking a lot longer than expected. The surface of the coffee table was not difficult to sand, but as soon as I had to start sanding the edges, I noticed that the edges were going to be a lot more difficult than the surface. On the edges there were spots that were becoming uneven so I needed to adjust my approach to sanding. I noticed that I needed to sand off the glossy stain and then round out the edges. After I finished sanding the edges I sanded the whole table again with 120 grit paper as recommended. After that I sanded the whole table with 220 grit paper to finish the sanding. My next step is to find the color of stain that I desire and stain the table. I will post a video of me staining the table!
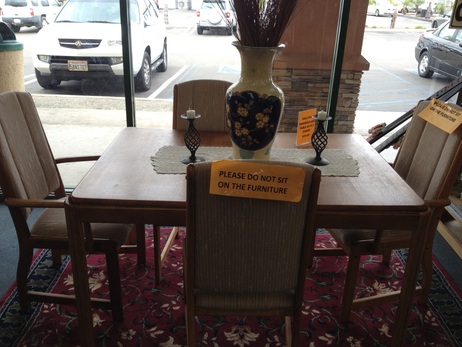 My goal is to have a dining set so when I move out in August I have something to have dinner on. I have not had success with finding a cheap dining set where I can refinish the table top and reupholster the chairs. I have gone to three different Goodwills, a thrift shop, looked on Craigslist, Offerup, and in the Pennysaver. Due to financial issues, it has been difficult to buy an old dining set and refinish it. Another issue that I faced was that I do not owe a vehicle large enough to transport a table and I have a limited amount of storage space. The dining set you see pictured I found at Shopportunity Catholic Charities in Vista. I liked the table and chairs, and although it was reasonably priced, it was out of my price range. However, I found a free coffee table this past Saturday, March 7th, that I am going to refinish. I can use this coffee table for my living room so that when I have guests come over they have something to put their drinks on. I am still going to look for chairs to reupholster. However the goal for right now is to:
1. Ask my uncle for his belt sander. 2. Watch videos and read articles that I have pinned on Pinterest on how to correctly sand a table top. 3. I am going to sand down the coffee table to get rid of some scratches. 4. Find the color of the stain that I wish to have my coffee table. 5. Watch videos and read articles that I have pinned on Pinterest on how to correctly stain a table top. 6. Stain the coffee table. In the week to follow I hope to find a few chairs to reupholster using Craigslist, Offerup, the Pennysaver, as well as looking at Goodwills and thrift shops. I will post a video of me sanding the coffee table, stayed tuned! |
Edgar AyalaI love mathematics and how everything in mathematics can be proven going back to simple axioms. I am a mathematics educator at heart and I hope to make learning mathematics fun for all my students and hope to instill the value of education in all my students. ArchivesCategories |

 RSS Feed
